The Roomba series of autonomous vacuum cleaners by iRobot, has revolutionized and completely rewritten the rules of vacuum cleaning in homes. The first Roomba models, Roomba Pro and Roomba Pro Elite were unveiled on September 2002. Ever since a lot more models have been developed including the latest Roomba s9 and s9+ models brought to market in May 2019.
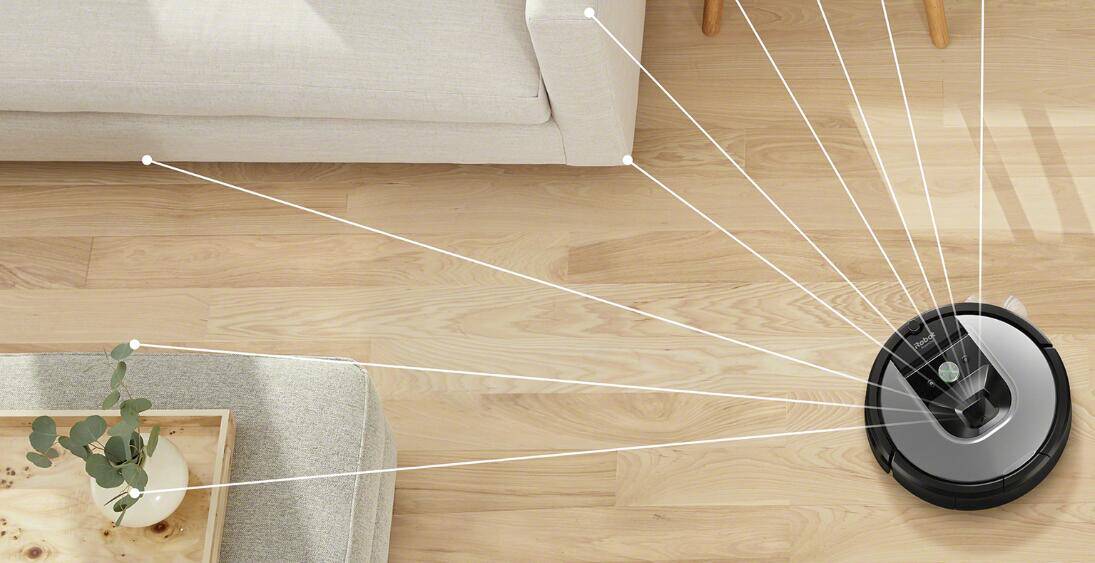
With built-in cutting-edge technologies such as Clean Base™ Automatic Dirt Disposal, Imprint™ Technology, and Dual Multi-Surface Rubber Brushes, and vSLAM® technology, Roombas almost perfectly mimic human cleaning processes. They can detect dirt, maneuver around barriers, and deep clean different surfaces thanks to the teamwork of their two rubber-threaded brushes.
To get the best service from your Roomba, you must prioritize preventive maintenance and undertake repairs and replacements immediately a problem develops.

Authorized Dealers, Product Returns and Warranties
Before looking at maintenance best practices, it is important to emphasize that iRobot products and accessories ought to be purchased from iRobot stores or authorized dealers. Buying Roombas from vendors and auction sites not sanctioned by iRobot can expose you to defective or substandard products.
In case you purchase a product and it turns out to be defective, you should contact customer care helpdesk within 30 days from the date on the delivery note and quote your order number.
To prove the confidence that iRobot has in their Roomba vacuum cleaners, they offer a 30-day, money-back guarantee and a one-year limited warranty for parts that includes the battery. There is a separate one year-warranty provided for the Clean Base Automatic Dirt Disposal unit. To learn more about warranty conditions, visit their site.
Common Problems with Roomba Vacuum Cleaners

iRobot spends billions in research and development (R&D) of new products and improvements of existing products. In 2018, the company spent the US $141 billion and so far in 2019, it has spent US $71 billion in R&D.
However, even with such huge research and development expenditures, there are still areas that are not completely fault-proof. This is where routine maintenance comes into the picture. As the end-user, it is your responsibility to ensure that the following issues are detected in advance and remedial measures taken in good time.
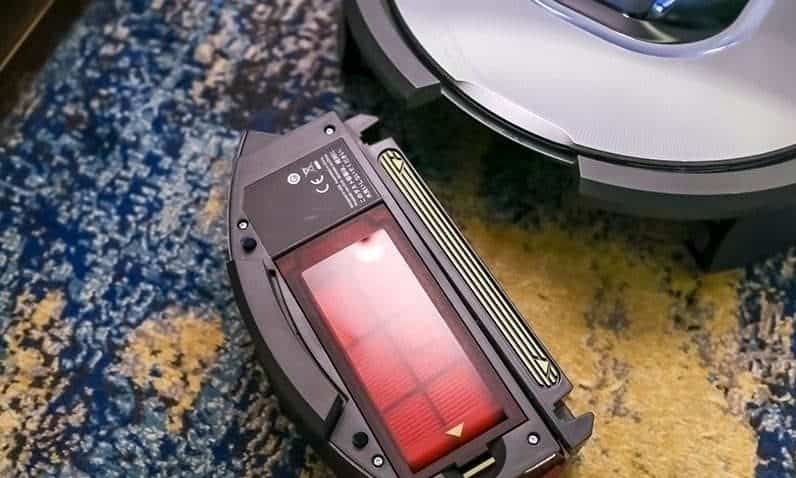
1. Battery Malfunctions
The batter is the heart of the Roomba system. It powers all maneuvers the Roomba makes in the process of vacuuming. Common battery problems include overheating which occur when the cleaner is plugged to power exceeding1250 mA. Defective batteries are also a principal cause of battery malfunctions.
2. Jammed Roomba Wheels
The wheel module on your Roomba may stop functioning, causing the wheels not to move. The reasons for this could be anything from hair stuck in the module to a broken wheel motor.
3. Entangled Brushes
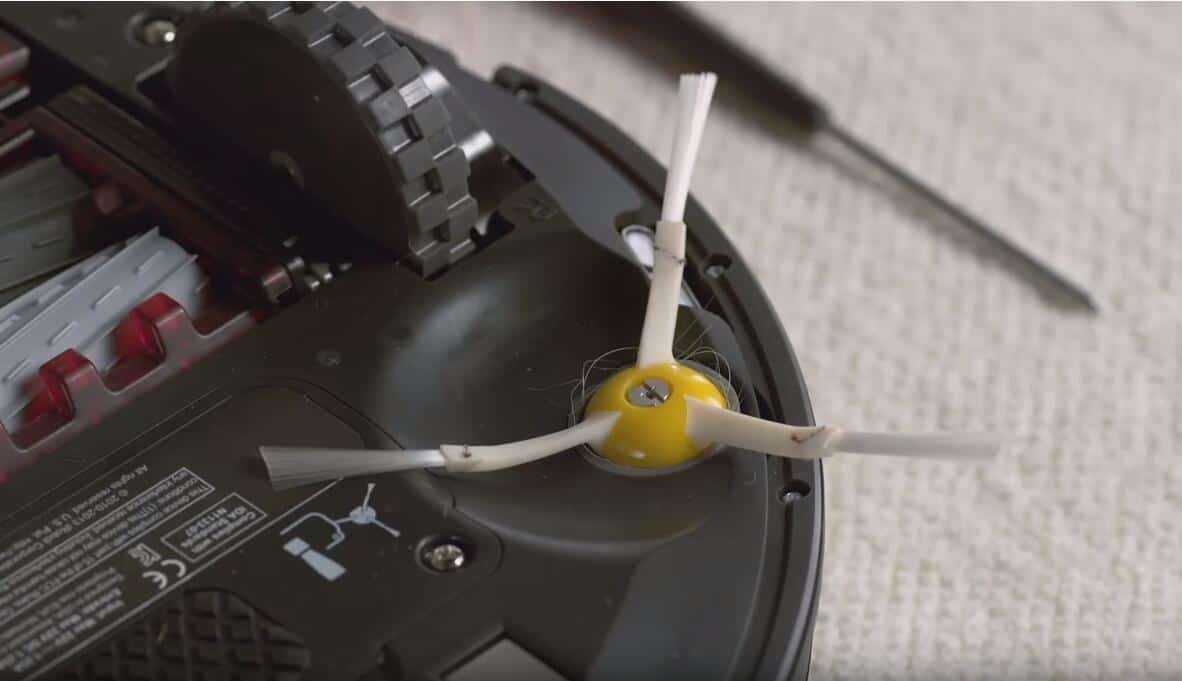
Normally signaled by two beeps, this problem is often caused by debris such as hair lodged somewhere in the brush. Depending on the degree of entanglement, the brush may stop turning thus affecting the cleaning process. Homeowners with pets, experience much of such problems.
4. Dirty or Malfunctioning Cliff Sensors
Sensors are what makes the Roomba smart. When damaged, cliff sensors may cause the Roomba to wrongly interpret a dark carpet or a hardwood floor for a cliff or a ledge. This means it may stop cleaning altogether or avoid dark carpets lest it ‘falls off’.
5. Failure to Return to the Home Base
Ideally, your Roomba should return to its base after the cleaning process s over. However, this is not always the case; it may stop where the cleaning ends. This could be caused by among other things, foreign objects that are stuck on the Home Base or bumper.
Maintenance of Best Practices

The above problems are in no way exhaustive. This means, as a homeowner or the person in charge of its handling, you’ve got to be prepared for anything. However, it must be pointed out that most errors can be contained if proper maintenance practices are observed.
Discussed below are some maintenance measures you could put in place to help you avoid emergency breakdowns and costly repairs.
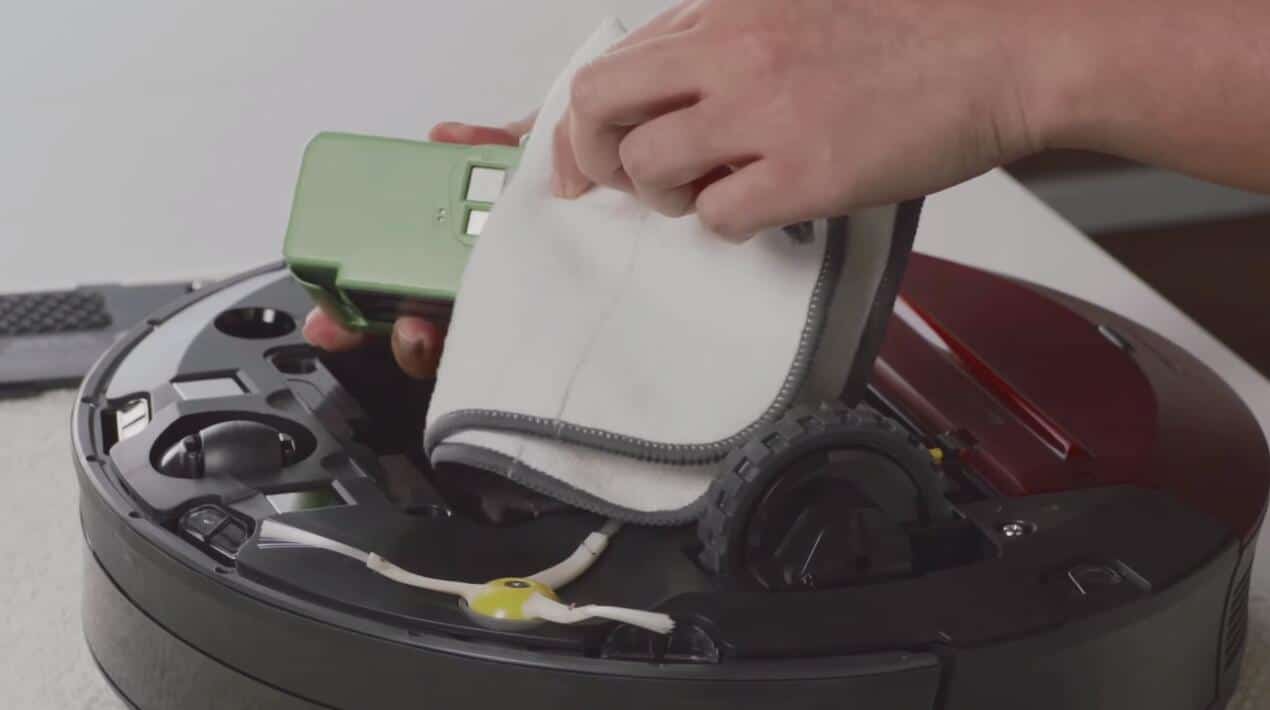
1. Removing and Cleaning Filters
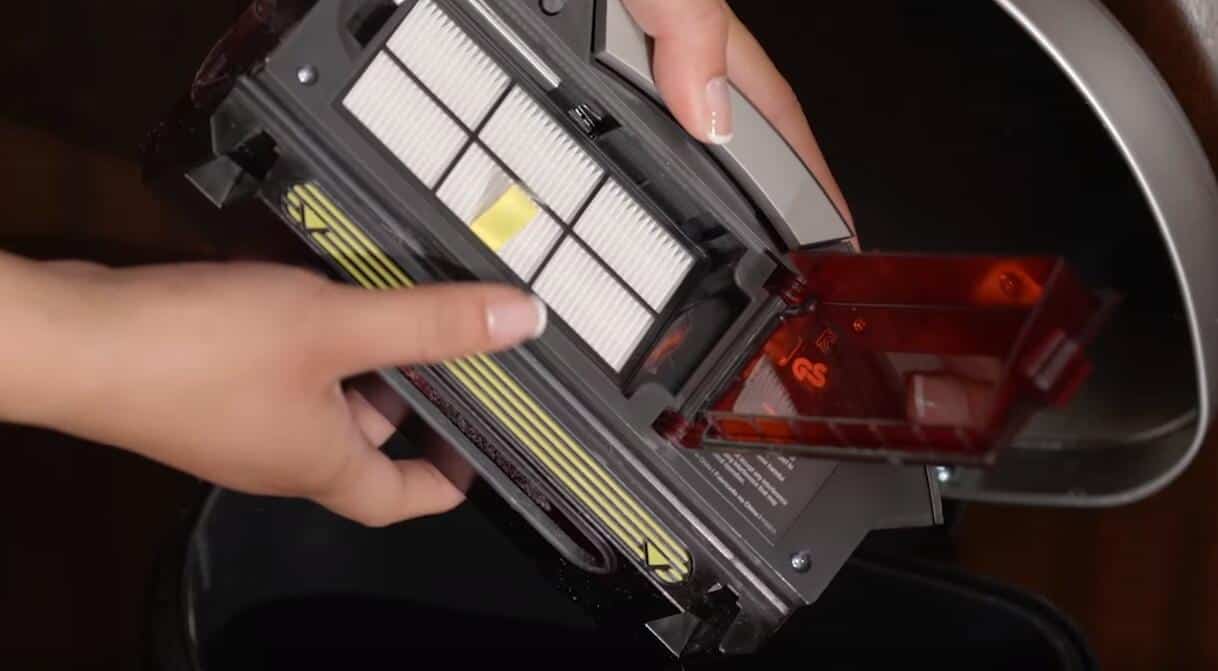
Filters play such a critical role in catching dust and debris. Therefore, they become loaded with dust after some time. The filter cleaning process may involve tapping them against the side of the trash can or blowing them out using compressed air. You may also decide to wash. However, if you do so, ensure you don’t return them until they dry out completely.
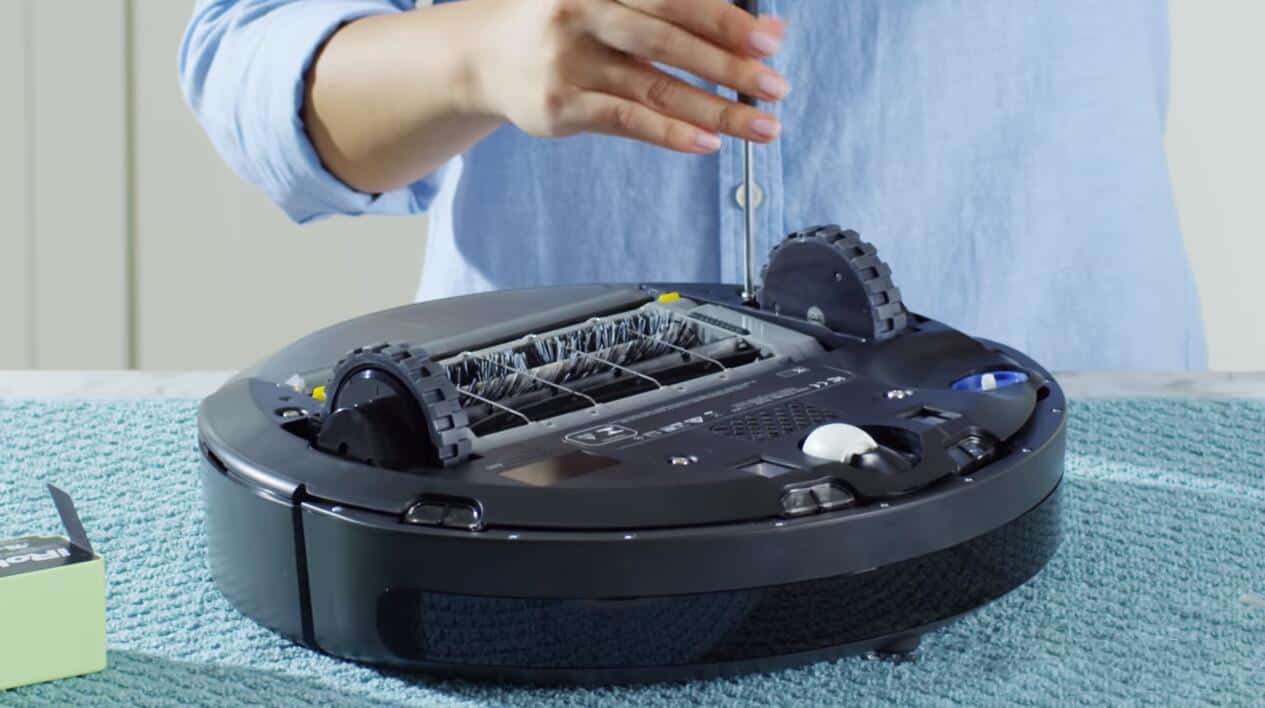
2. Cleaning Brushes and Bearings
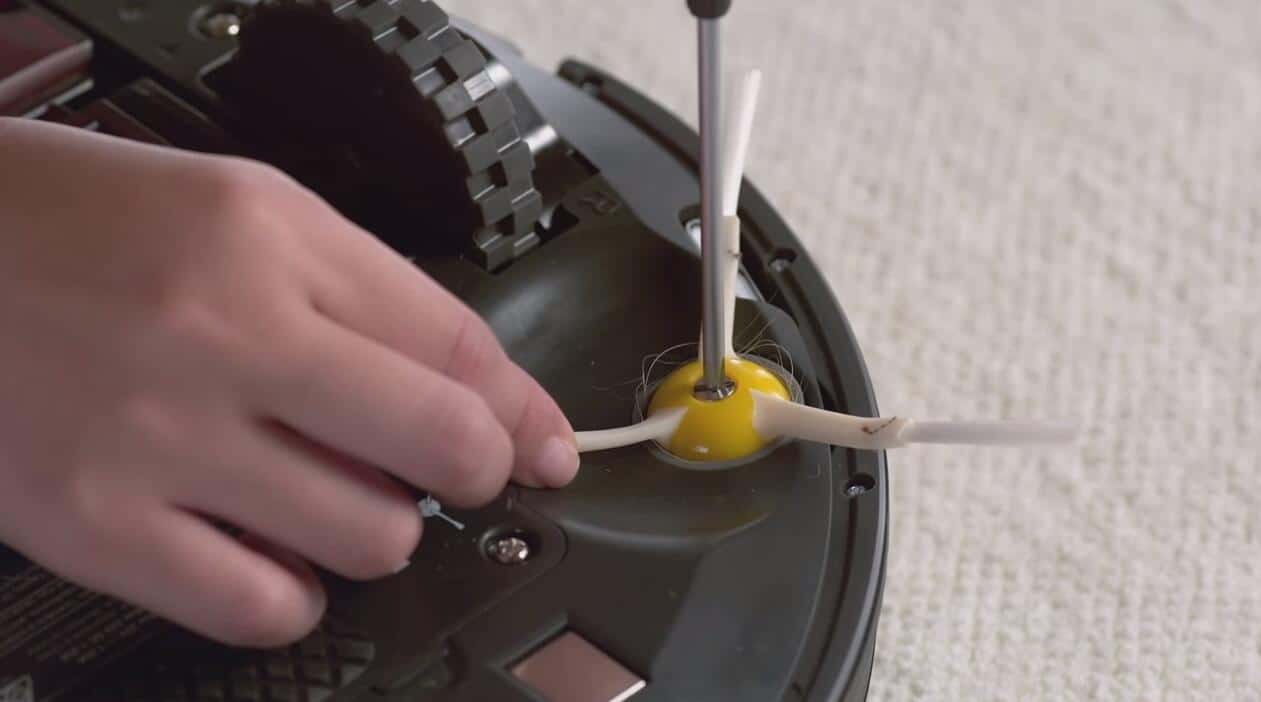
This should be done on a weekly basis. Most Roombas come with cleaning tools you could use to remove debris and any entanglements on the bearings and brushes. Alternatively, a fine-toothed comb could do the job as well. Accumulated debris can potentially slow down the motor.
Depending on the frequency of vacuuming, you may need to replace the Roomba brushes sooner or later to maintain or enhance the cleaning performance. A Brush Kit normally includes side brushes, bristle brushes, and flexible beater brushes, a pair each.
3. Cleaning the Front Caster Wheel
The wheel module often suffers from accumulated hair and other debris. When it stops rotating, begins squeaking or falls out, this could be signs that it needs cleaning. After removing it from its housing, be sure to check the axle and wheel cavity for entangled and accumulated debris.
4. Unscrewing and Cleaning Under the Spiral Brush
This is a much more intense procedure that should be carried out monthly. Depending on the frequency of vacuuming, a whole load of debris may accumulate under the spiral brush. This should be removed to boost the overall efficiency of the vacuuming system.
5. Cleaning the Inner Part of the Roomba
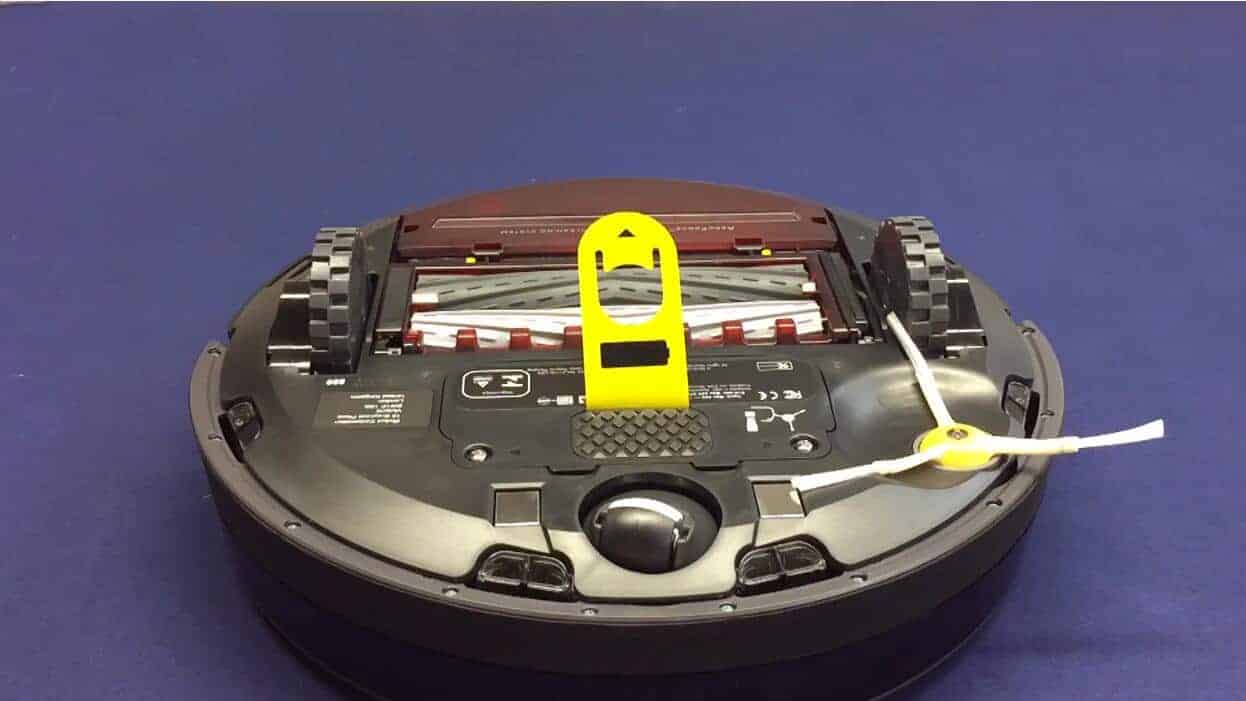
The inner, hidden chambers of the vacuum cleaning machine normally accumulate debris over a period of time. If left unattended, this may significantly lower the overall performance of the Roomba.
The best approach to accessing and cleaning the inner chambers of the Roomba is to first unscrew and remove the cover. Thereafter, using compressed air or a piece of dry dust cloth, gently clean the interiors. This is usually a monthly exercise, but you may have to do it more frequently depending on the projected rate of debris accumulation.
6. Keep Your Battery in Good Shape
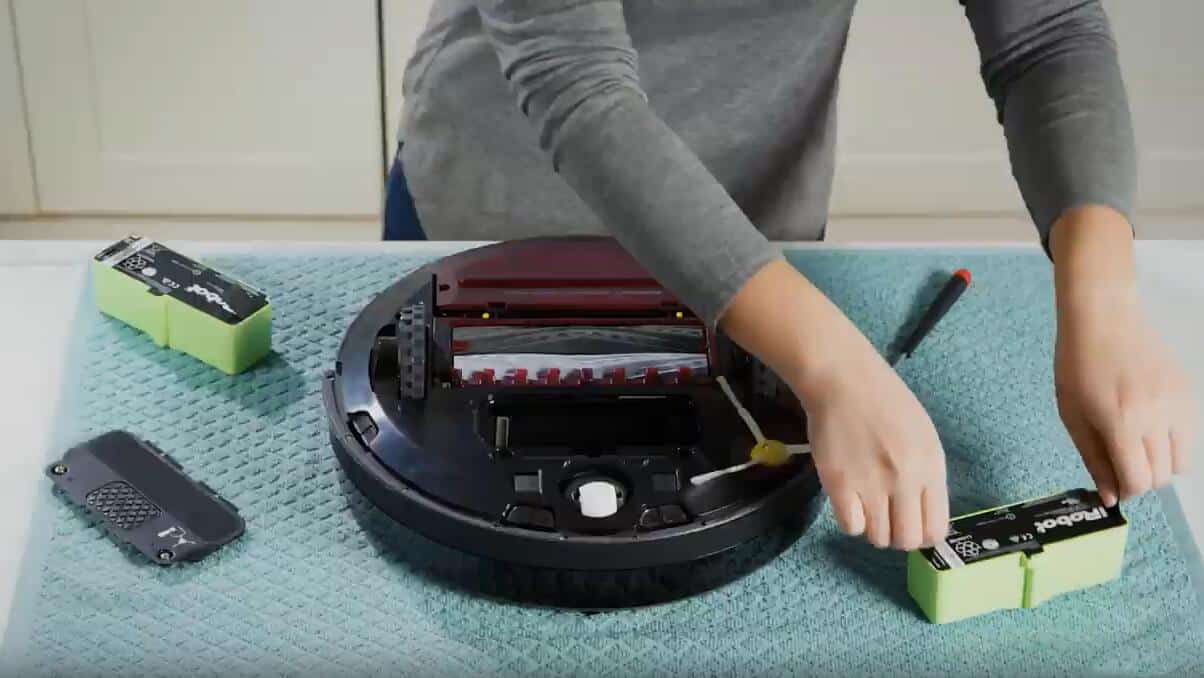
Roomba batteries are either lithium-ion (Li-Ion) or nickel-metal hydride (Ni-MH). The best practice is to ensure that these batteries are always charged. When the Roomba is not in use, the charged Ni-MH battery should be removed and stored in a cool, dry place. The Li-Ion can remain in the cleaner.
Keep the Vacuum Cleaner away from Extreme Temperatures
The vacuum’s battery and electronics are among the most sensitive to extreme heat or cold. Keep components such as the charging base far off from areas that receive direct, intense sunlight or are in close proximity to vents. Also, you should avoid vacuuming floors that have excess humidity or are at freezing temperatures. This can shorten the lifespan of your vacuum cleaner.
As a matter of policy, never buy non-OEM aftermarket accessories such as charging stands and batteries. Many of these parts are not designed with your Roomba in mind and may spoil it or inflict system damages.