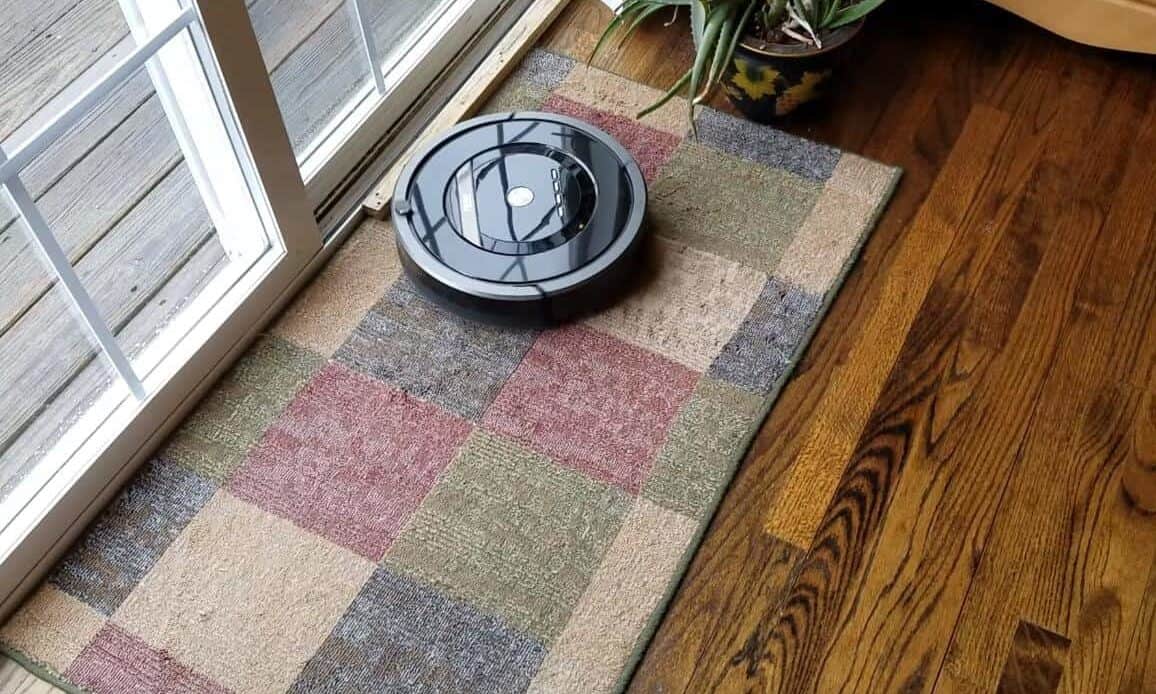
If you are like me, there are times you probably find yourself frantically trying to vacuum your place at the last minute. Naturally, I am thrilled by the idea of having a nifty vacuum that I can ‘set and forget,’ and enjoy a clean home at all times without breaking a sweat.
Whether you are thinking of buying or have already snagged one for yourself, you are probably wondering how to program Roomba vacuum.
In this guide, I will show you how to program and get the most out of your robot vacuum. In just a few minutes, you should be able to schedule cleans using your smartphone or the buttons on the robot.
How To Program A Roomba Vacuum Using Buttons

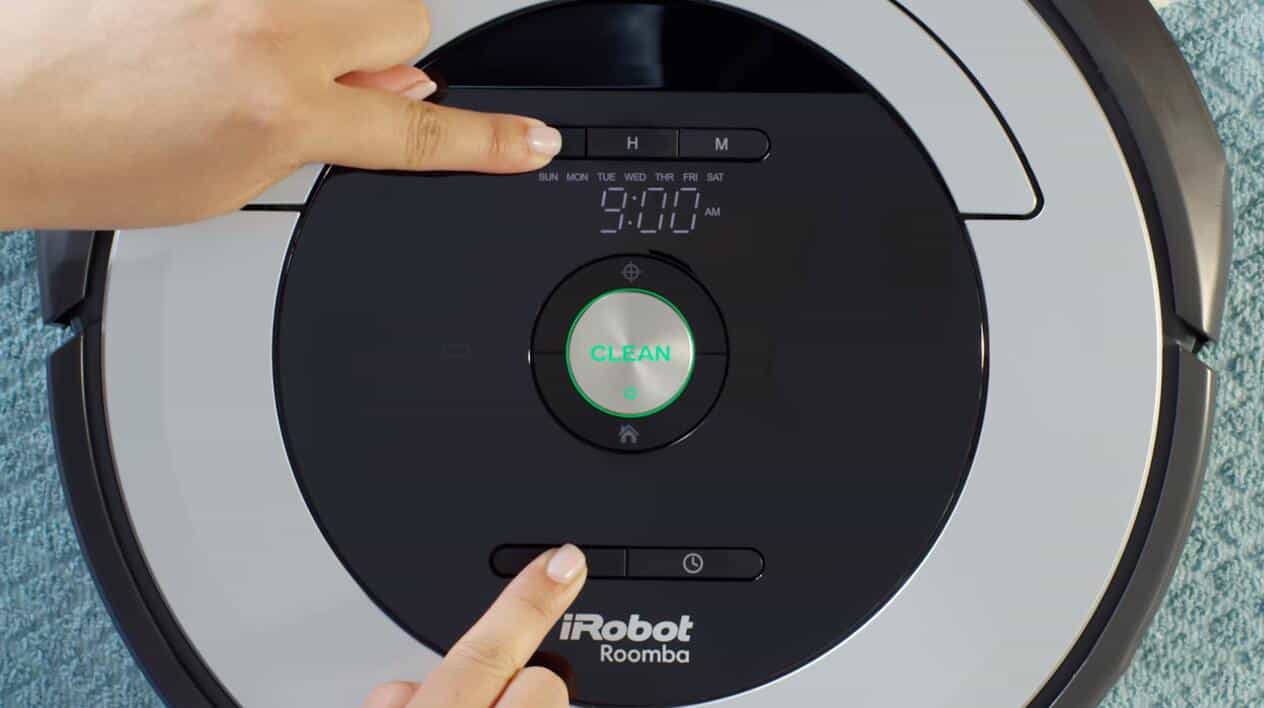
Although their design might vary slightly, programmable Roomba models feature Clean, Clock and Schedule buttons, which will come in handy when scheduling cleaning sessions.
Follow these steps to program your robot vacuum:
Set The Correct Time
Before you can schedule cleans, you first need to set the current day and time. To do this, press the Clock button on the surface of the robot, then, while still holding the button, choose the day, hour and minute using the respective buttons. This will set the correct time.
Once you have inputted the time, release the Clock button. The vacuum will produce a beeping sound indicating that you have set the time.
Choose Your Preferred Cleaning Time
This is where all the fun begins. Programmable Roombas let you choose the exact time and day you want the robot to clean. You can set the vacuum to clean once a day for up to seven days. The robot will clean an entire level of your house.
The only downside is that you have to manually select the cleaning day and time for each day of the week. What this means is that you cannot set a time, say 9.00 with the expectation that the vacuum will clean at that time every single day.
That being said, you can choose to schedule cleans only for some days and perhaps skip those days when you will be at home and would rather not contend with the sound of a robot waltzing around.
With other newer and smarter Roombas, you can select the rooms you want to have cleaned only on certain days. For example, if you want to have the kitchen cleaned every day but your bedroom just once a week, you can schedule that.
If this sounds like a feature you would love to have, the best Roomba model I would recommend checking out is the iRobot Roomba i7.
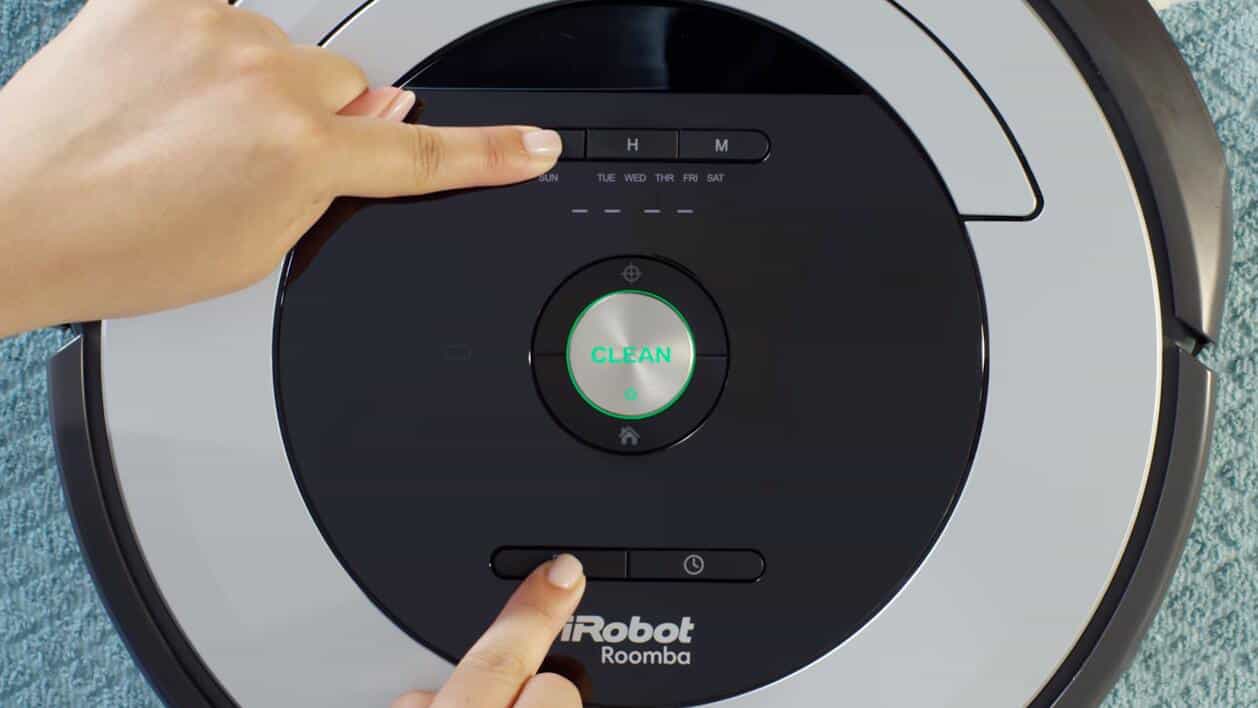
Let’s get back to scheduling a cleaning time. Press and hold the Schedule button. Then, use the respective Day, Hour, and Minute buttons to choose the preferred time.
For example, if you want the robot to vacuum on Mondays, Wednesdays, and Saturdays, press the Day button repeatedly until the desired day displays on the screen.
Next, choose the time you would like the robot to start cleaning. While still holding down the Schedule button, press the Hour button repeatedly until the desired hour displays on the screen.
Repeat this same process with the Minute button, if you wish for the cleaning session to start at a certain minute of the hour. You can now release the Schedule button following which the robot will beep to indicate that you have set the schedule.
Remember, you will need to repeat this same process for each day of the week you want the robot to clean.
I usually like to review and double-check the schedule I have set. To do this, simply press and hold down the Schedule button and then repeatedly press the Day button to view the selected days and time. If all looks good, simply release the Schedule button.
Change The Cleaning Schedule
I love that the Roomba robot lets you easily change or delete a schedule.
Sometimes, you want to change the hour and minute you had previously set. To do this, simply hold down the Schedule button and then repeatedly press the Day button to view the scheduled cleaning time.
When the cleaning time you would like to change appears on the screen, press the Hour or Minute button to input a new cleaning time. Release the schedule button. As usual, a beeping sound will follow indicating that the changes have been made.
To delete a cleaning schedule, hold down the schedule button and repeatedly press the Day button until the day you want to delete appears on the screen.
Then, press and hold down the Day button to remove a certain cleaning time from the robot’s schedule. The robot will beep to indicate the schedule has been deleted. Release the schedule button.
How To Program A Wi-Fi Enabled Roomba Vacuum

One of the biggest perks of a wi-fi enabled Roomba vacuum is being able to schedule cleans from your smartphone even when you are away from home.
To get started, you will first need to download the iRobot HOME App. Next, open the app and select your robot. To schedule daily cleans, select Schedule—this should be at the bottom of your phone screen.
From there, you can use the controls to choose the day and time when you want the robot to clean. The controls will turn green indicating a schedule has been set. Repeat these steps for each day you would like to schedule the bot to vacuum. Your robot will automatically start cleaning on the pre-scheduled days.
To turn off a day, simply toggle the respective control button, which will then change from green to grey.
Conclusion
A programmable robot vacuum takes the hassle out of keeping your home clean at all times.
In particular, Roomba models make scheduling cleaning sessions super easy and the best part is that you can pre-set your robot to clean up to seven times per week.
Here’s a quick recap on how to program Roomba vacuum:
- Hold down the Clock button to set the correct time
- Hold down the Schedule button to select the day, hour, and minute for cleaning