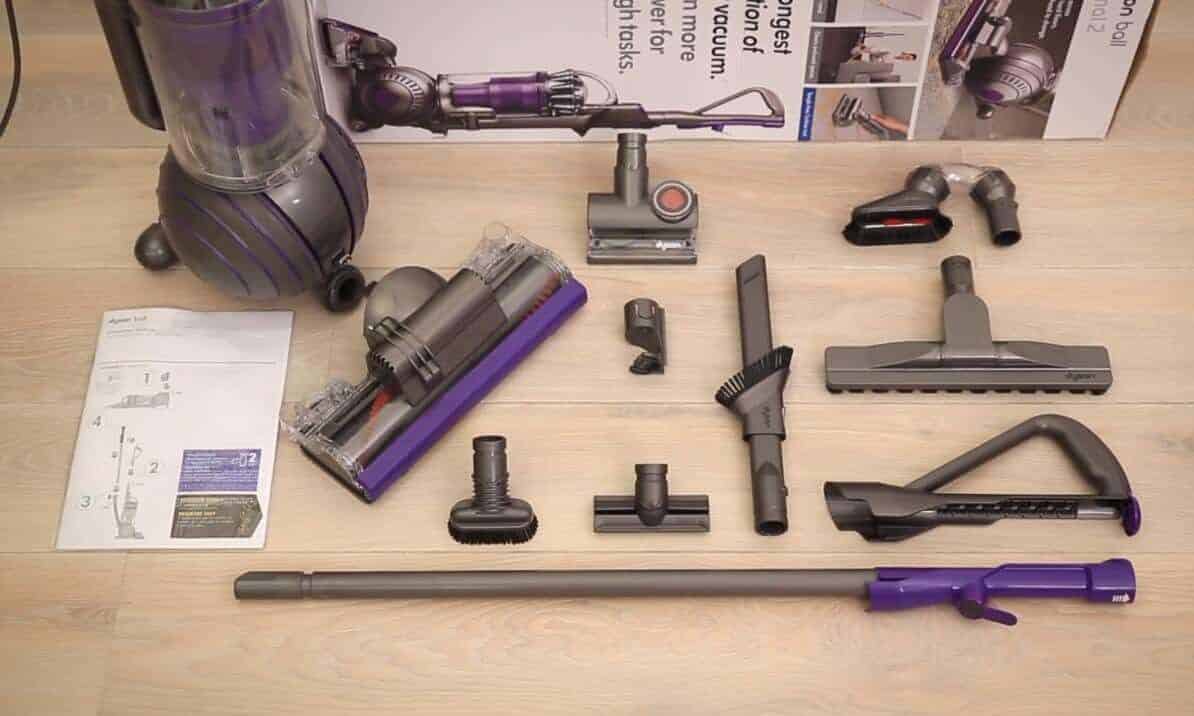
Can you see a tear near the end of the hose of your Dyson vacuum? Has it made its presence felt by lowering your Dyson’s suction power? Then you have two options to make things right.
First up, it’s the expensive option which requires you to replace the hose altogether. The reason why we recommend against this option is that in addition to being expensive, there’s no guarantee that the new hose would last as long as the previous one. So why gamble?
That leaves you with only one option: fix the existing hose. Doing that will not only save you the money which you might otherwise have spent on a replacement, but it would also help your vacuum get back its original suction power. That means that you’d have the best of both worlds.
How to fix a Dyson Vacuum hose
Before you roll up your sleeves to do the hard work, make sure you have the following tools at your disposal as they are crucial to the success of the whole operation.
Tools You’ll Need
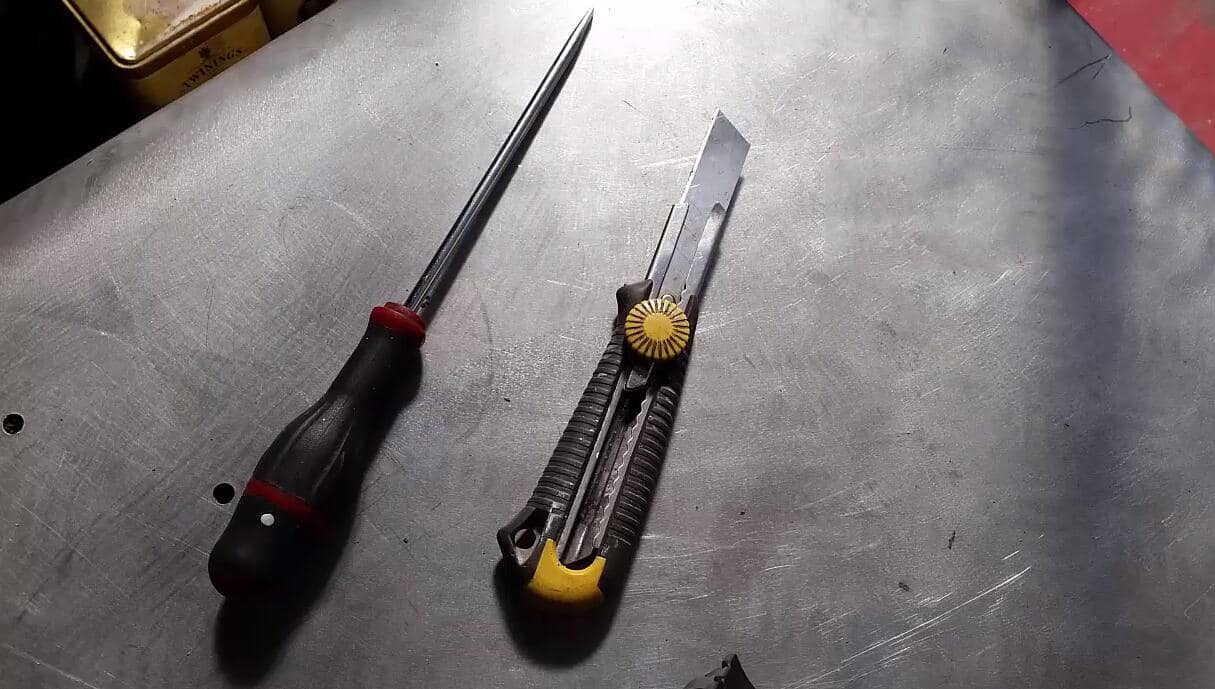
- Flathead screwdriver
- Wire cutter
- Utility knife
- Super glue (epoxy)
Step-by-Step Instructions (for a direct connect systems)
Follow the following steps to fix the broken hose of your Dyson vacuum.
Step # 1:
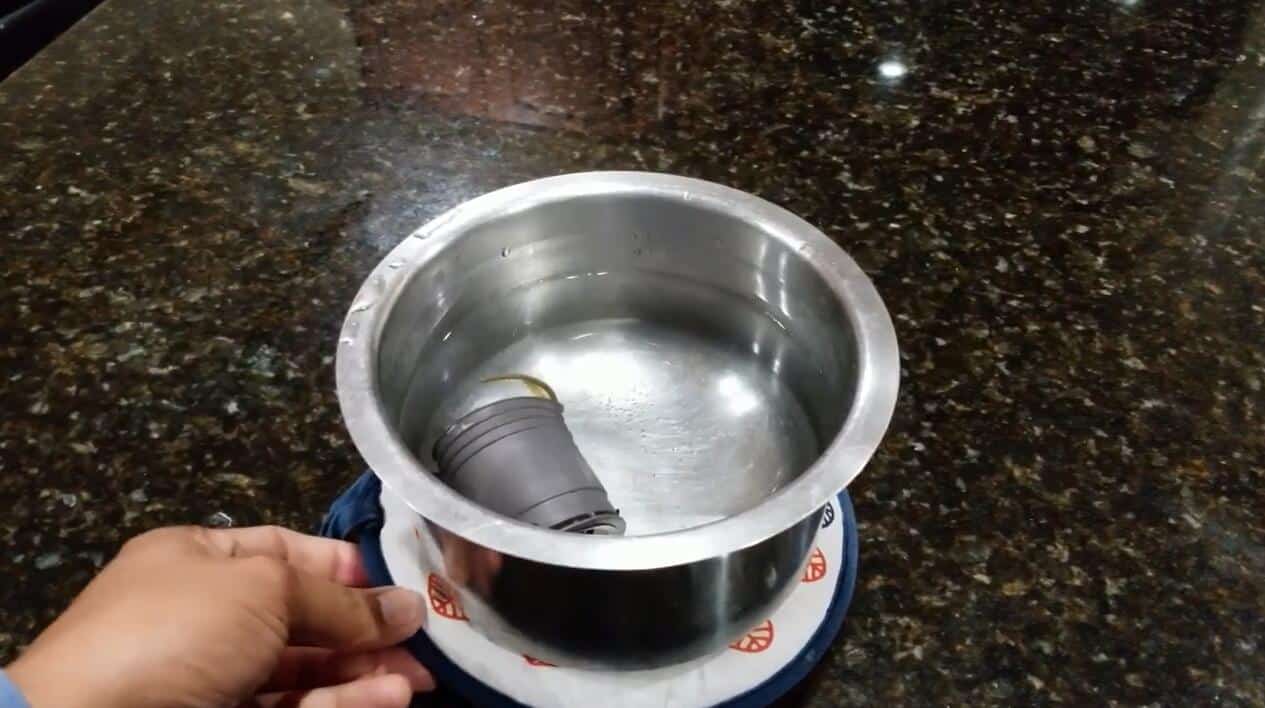
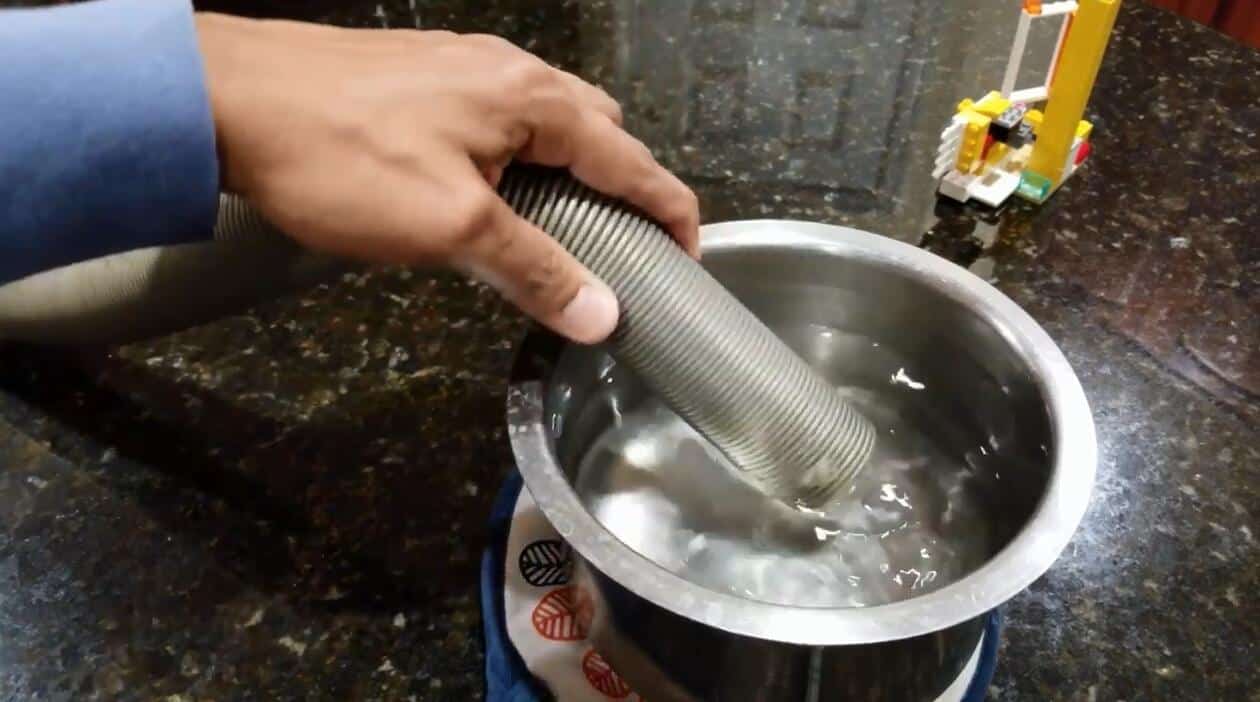
Before getting started, boil some water as it will help us in detaching the hose from the vacuum without breaking it. Once the water is boiling, submerge the hose end of the hose in it. Doing that will soften up the plastic and everything will become more flexible.
Step # 2:
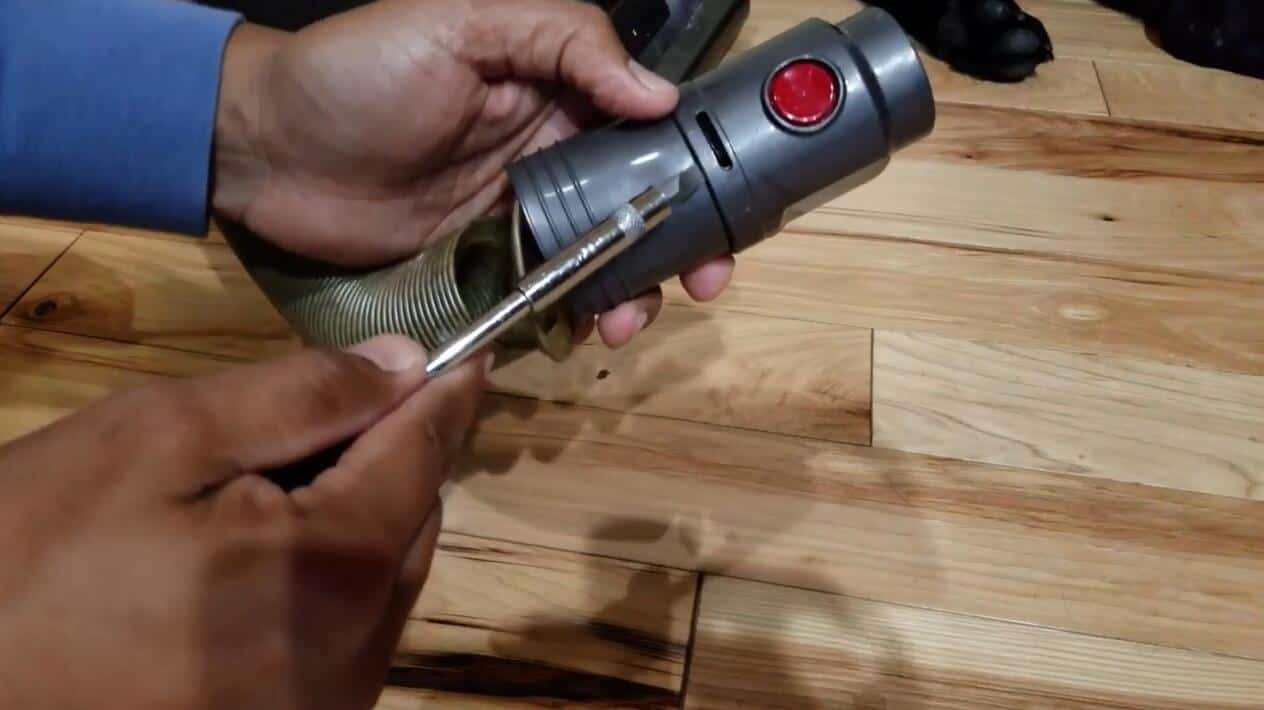
Let the hose dry for 15 minutes. Then, release the two black tabs which are on either side of the hose to detach it from the unit. As you’re doing that, squeeze both the sides of the hose by holding its end which has the lock button on top.
Now, get the screwdriver and insert it into the first black tab. Twist the handle of the screwdriver to free the hose from the grip of the hole until you hear a click. Once the end is released, insert the screwdriver into the 2nd black tab and repeat the procedure to release it as well.
Step # 3:
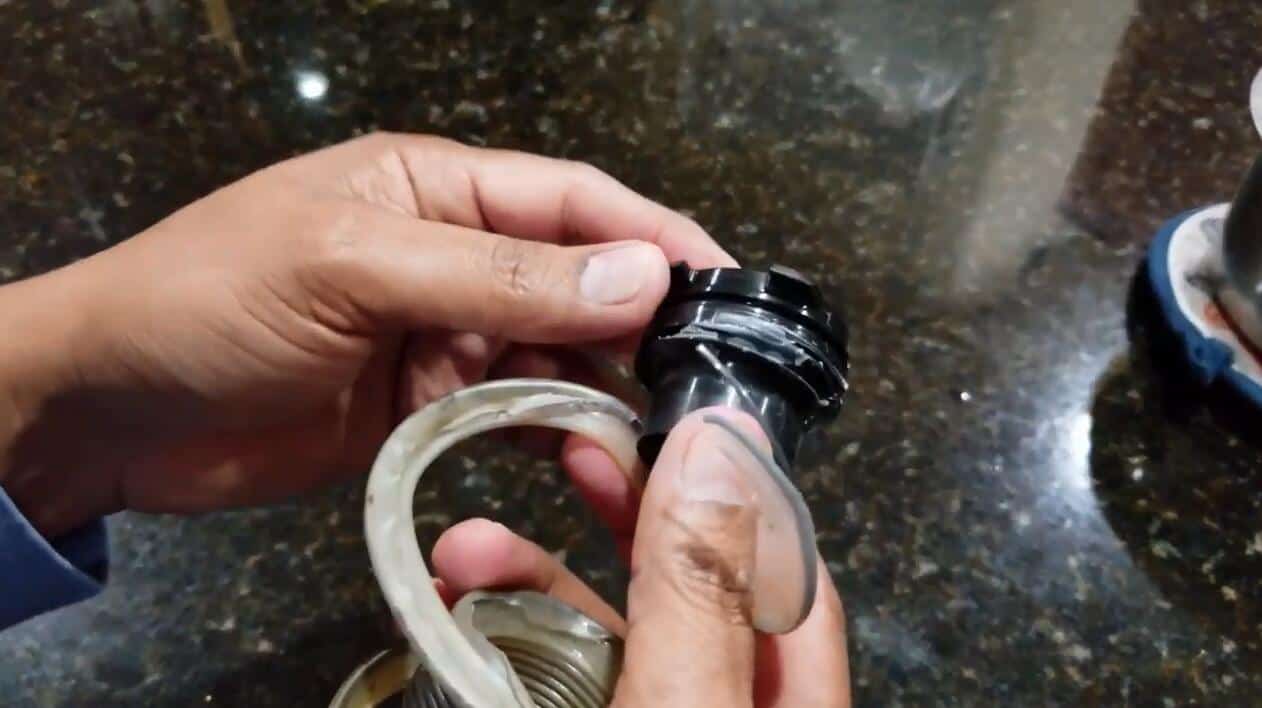
In this step, we’re going to free the black (plastic) end of your Dyson’s hose. You’d have to apply some brute force to free the plastic piece from the hose end which is gripping it at all times. Once it has freed up, the plastic end will look like a black cap.
Step # 4:
This step involves shortening the length of the hose. That is because you want to make sure that while you’re removing the hose from its gripping place, the stress on its end is as less as possible. To do it, use mark a point at a distance of about 2’’ from the end of the hose.
Then, using the utility knife and the wire cutter, cut the hose at the designated spot. Make sure you have completed removed the marked section of the hose.
Step # 5:
Since you are going to re-attach the hose in this step, the first thing you should do is to snip the hose over the black plastic piece. To do that, use the knife to make a clean cut at the end of the wire, before making a V into the hose so as to make sure that the wire fits snugly.
Once you have made all the cuts, use a clean cloth to clean the inside of the hose. This area will be dirty as it has been accumulating dirt without any cleaning for years. Furthermore, since you’re going to attach glue to this part, it should be as clean as possible.
Step # 6:
Once you’re done with cleaning the inside of the hose, the next step should involve cleaning that black plastic piece which we retrieved in the earlier steps. Chances are that it would be extremely dirt with old glue and hose scraps, so clean it thoroughly.
Yet another reason why you might want to clean it as thoroughly as possible is that it’s on this surface that you’re going to apply glue in the following steps. And since glue doesn’t stick to a dirty surface, you’ve to give it a clean surface to stick to.
Step # 7:
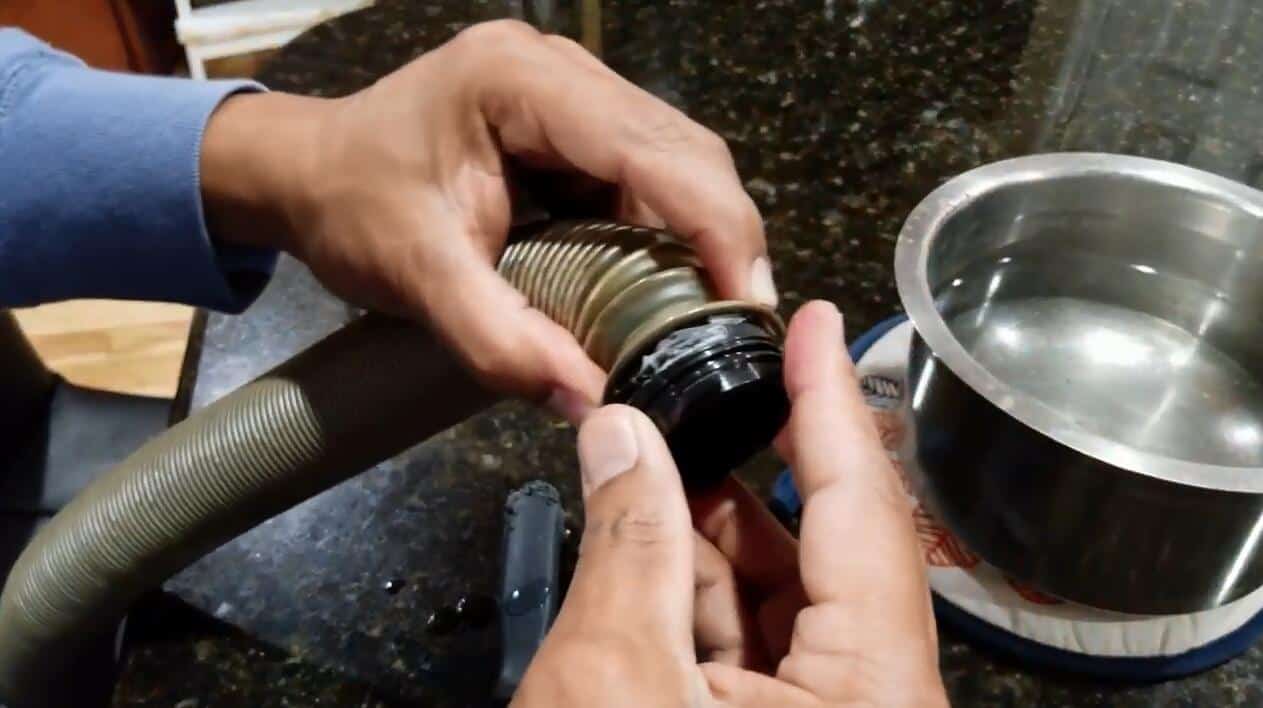
In this step, you’re going to put everything back together.
Before you go any further, test the fitting of the hose and the black plastic piece. Make sure they fit as snugly as possible, and if you deem it necessary, you can add extra glue on the inside of the hose (or the outside of the black plastic piece) but not on both parts.
Once you have lubricated one of the two surfaces with glue, give it a few minutes to dry. The glue which you might have chosen should have come with instructions of its own. Follow them to get a secure and strengthened connection. Afterward, once the time is up, fit the hose over the black plastic piece.
Step # 8:

To get a secure connection, fill the holes in the plastic hose with the tables that you can easily see on the black plastic piece. Once everything has lined up, push both the components together and don’t stop applying effort until you hear a click sound, which is an indicator that everything has sat into place.
Finally, with everything in fine working order, push the hose end into the plastic sheath of your vacuum. You may have to improvise a bit since the hose isn’t the old one, however, with a little effort, you shouldn’t encounter any problem to push the hose end back into its gripping place.
Conclusion
Whether you have a corded or cordless vacuum, chances are that its hose might break up after a few years of usage. The same thing could be said for upright vacuums, canister vacuums and even those vacuums which are dedicated for pet hair. Therefore, if you want to be prepared before the emergency strikes, you should be aware of the steps using which you can fix a Dyson Vacuum hose at home.